The Dragonfly Shawl has now made its appearance in the Winter Issue of Interweave Crochet. I have been cautiously waiting for its release. Why cautious? I think perhaps it is more a reserved excitement… as I do not think this creation has completely made its way through my brain that it is complete, that I finally finished it.
And here it is, the Dragonfly Shawl. For some, here is the Dragonfly Shawl on Ravelry. Each time I look at it, and I know it sounds bad since I am the designer, but each time I look at it, I wish I still had it with me to wrap around and admire it. I have always had a love for little winged creatures.. whether butterflies (and yes, butterflies especially), dragonflies, ladybugs…
And while I am quite frightened of dragonflies, I admire them from afar. Kind of like when you admire something or someone that intimidates you, but not in a bad or condescending way, but in a way in which your admiration is due to a longing of finding yourself and really honing in on what you would like to become. No, I do not want to become a dragonfly…
The beauty, the grace – that is what I wanted in this shawl… I wanted it to sway in the breeze effortlessly with grace off of one’s shoulders… I wanted the beauty to be delicate, yet strong. I wanted it to portray the passion – the flight of the dragonfly, to flutter, then soar right past and leave one’s heart pounding. I hope it does just that…
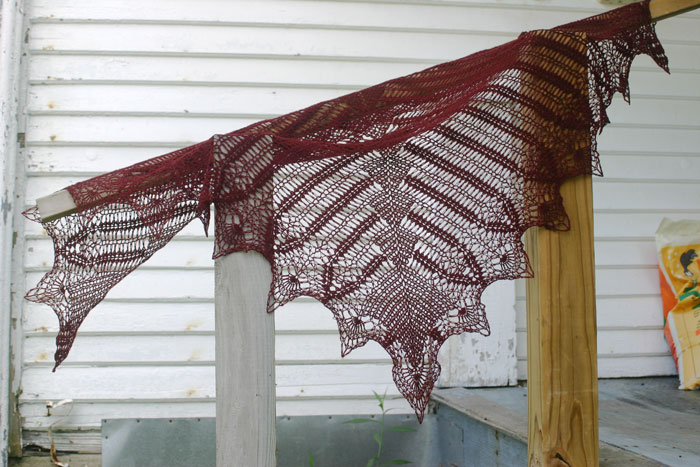
Dragonfly Shawl
This design was a DIP (Design In Progress – how I refer to them as) for 6 or 8 months. I really admired knitted shawls. There are some pretty fantabulous (yes, another Lisa word) shawls out there in crochet! But I wanted something that would literally, take one’s breath away, for a moment… At the same time, I did not want it to be so difficult, that not even a master crocheter would not be able to do it. Then, there was also the task of keeping the pattern at a relatively decent length (that will be another post, length of patterns).
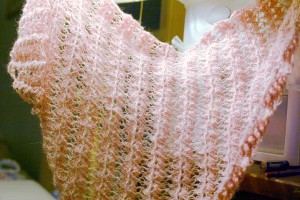
A very early prototype, which was soon ripped and not part of the later infant prototypes. The striations were a go, but how to shape and mold them into the beloved dragonfly?
I had to constantly think ahead (and yet again, thinking ahead in pattern writing, due out in another blog post), because the action of what I do in one row could effect greatly another row and its wording, and thus the domino effect.. before you know it, your pattern cold be 10 to the 10th power pages long (well, not literally, I hope), but you get the meaning.
I also do confess.. this was my first time ever working with a laceweight yarn. I am not a stranger though to size 10 thread, or even size 30 thread. The only wool I had ever been in contact with was Lion Brand Wool-Ease (worsted weight blend which I dearly love) for my Rugged Mountain Hat & Mitten Collection and Schoeller + Stahl Baby Micro (fingering weight wool -a dream to work with), that I used for the Stone Path Hat, Interweave Crochet, Winter 2007 issue.
So, though I have worked with wool before, and I have worked with everything from a size 30 thread with a size 10 steel hook through a wool fingering weight.. I had never worked with a laceweight wool before, except for what I was swatching that shawl with. The yarn used for the Dragonfly Shawl was a dream to work with – Jade Sapphire Exotic Fibres, Lacey Lamb. Talk about an induction into laceweight yarn… Silky soft.. the yarn glided and moved with hook harmoniously… I will be making many more shawls now that I have had a taste of laceweight yarn, and Lacey Lamb will be at the top of my list. What colors??
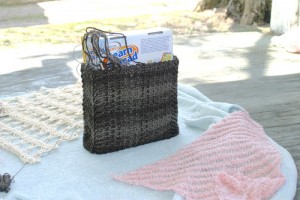
While working on the Oxford Town Bag for Interweave Crochet (Fall 2008 issue), here is the infant shawl in the background, still in its infancy stages. To get a chance of pace from the tote, I would sometimes work on the shawl before putting it back in the DIP pile.
So.. how did this shawl really come to be. I never thought it would come to be anything. I had it as a DIP for a long while. I would take it, only to put it back in hibernation until I felt the urge to play around with it again. I was emailing Kim Werker (Editor of Interweave Crochet) some photos of possible propositions of submissions. (I intended to send in a swatch later if any were remotely interesting). That is enough detail on that. So.. here I am rummaging through my computer of my DIPS. It was quite late, maybe past midnight. I sent numerous photos and every so often I would email her saying, I do have a *partial* shawl DIP.
I did not send it. I sent a couple more.
Again, I said I do have a photo somewhere of a shawl I have been sort of working on, but it is a piece of art that has been in the works a LONG, long time. *Sent off a few more photos of other DIPS.*
Then, I cannot even find the photo of the shawl on my computer.. Yes, me and my scatterbrainedness (a Lisa word). Finally, I find it. Now, this shawl had been in the works for many many maaannnyy months.
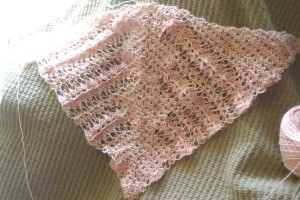
Shawl in infancy
Do I dare send it? I am sure it would illicit no response. What the heck. So I send her this goofey photo. Unblocked of course, showing no detail of the possibilities it *could* have.
I cannot tell you how many times this shawl was ripped out and reworked. And I will say, laceweight is not always that easy to rip out. I really needs the gentle touch… Kind of like with a toddler, you need to be gently, but firm. Too gentle, and nothing changes.. too firm, well, you may have throbbing ears for a while from that resistant one 
I also had a photo up against the miniblinds in my kitchen. This one at least showed a bit more detail. But still, nowhere near the vision I had. It was still all crinkled up. Since the photo was only for my own benefit, I never bothered to smooth out the progression of the shawl, or “what could be.”
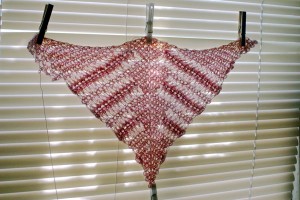
Shawl in infancy, photo 2
This photo though was the one that did it. Kim was interested. She saw something alive there. She saw the potential. It was like she immediately read my mind and knew what I was trying to do with this shawl. I credit her eye for detail, her gift for seeing the beauty beneath the chaos… her ability to envision the possibilities… So, it was a done deal after all was just that, said and done. She asked, can you hash out this design on such and such tight deadline? “Sure I said!….” After that, shaking my head but not surprised.
Sometimes I need a good kick in the hiney to get a project off its feet. This one had been in the works much too long.. it was time for it to be developed. I was
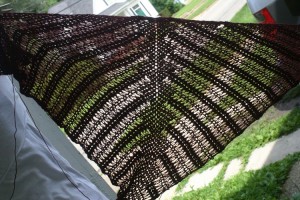
Sun pic! Taken on porch.. Not sure if I was trying to fly at the angle this photo was taken??
worried, but excited. Excited to finish it, worried of how I would in such limited time. I work pretty well both under pressure and at leisure.. And if I knew myself, I knew that I would still churn out a quality design.. I just wondered, am I sure this time I would?? After all, it has been a design under my desk since dawn of the last creepy crawlers.
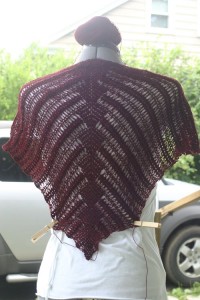
Before Edging
Yeah, can you tell I love my clothespins?? I swear, those things are the GREATEST invention.. In a pinch they are wonderful for pinning hair up in a bun for a midnight run to the corner store.
You see, working up a pattern is much, much different, or well, takes less thought when not in pattern-writing mode. Basically, it is almost like free-form.. You are following a guide (say your guide may be a triangle shape) and you just continue crocheting and working and trying on as you go etc.
When writing a pattern, for me at least, I am always thinking one step ahead. As I said earlier, something done in Row 5 can have a cascading effect in Rows 6-30. This shawl works not from tip, not side to side, but begins with a mini triangle. Think of a triangle having 2 tips and one point. The point is the central part (see bottom of shawl in photo) with a tip at the other 2 corners of the shawl (by one’s arms). So this shawl worked from one tip, to point, to next tip. That way, one can work until length and width are as desired.
So anyway… You see the diagonal heavy lines, and then the open airy diagonal lines? Those coincide with the stacking diamond spine. If you look closely, a heavy line occurs at the center side of each diamond. This is where the writing became tricky. When space is a concern, I HAD to take into account and somehow form a repeat. This was VERY difficult and well, think I went through major carb overdose with the amount my brain neurons were firing… See, the shawl is symmetrical.

Photo posted with permission from Interweave Press
So, going up one side of the shawl, to the point, and then going back down the next side, this increases the number of heavy lines and airy lines each subsequent row. When writing one side before the point, I had to be careful that the rebound (the side on the other side of the point) would not take up too many words.
I really tried to get it so I could eventually say rep rows “X through Y” until such and such. Getting distance between X and Y a minimal number was a task.. with instructions on one side along with different instructions on the rebound, and getting all of those rows to eventually repeat themselves so as to not have a 20 page or more pattern, was a whole new endeavor.
This pattern really refined my writing skills. Not only did I have to make this pattern’s instructions compact while designing it, I also had to keep in mind clarity for crocheters. It would be nice, if I could have had nested repeats (a repeat within a repeat, within a repeat), but alas, I would definitely end up with many upset crocheters 
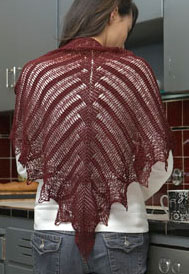
Photo posted with permission from Interweave Press
Then came the edging. And I say, then came the edging. I looked at my shriveled, decrepit looking piece of “art,” wondering how I was going to pull the edging off without it being a mountain of a pattern.
You see, I had a thing going.. my dragonfly theme. My plan was a play on negative space. See the strong striations coming from the diamond spine? At first, I was thinking of doing something overlapping.. And then I thought, do I want there to be a division line between the body of the shawl and the edging? I played around, but a stark division line would ruin my idea of having the negative space aspect to it….
So I had the heavy striations meet, creating wings… then between those slender wings, would again, be wings, with a pointy scalloped tips. I am not sure how long it really took me to come to this decision, but it was a lot of sketching, a lot of ripping, a lot of redoing, a lot of stretching, all the while praying I would not break the yarn too many times.
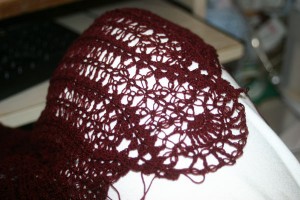
A contemplated edging. I was on to something I though as I continued to experiment and try different things... Photo taken right on my knee, so in case I ripped, I would have a moment to refer back to :)
Now my next quest was, how to get a REALLY lacey-but soul-grasping lace effect? Something not done before.. Something different. Something that would leave a wing-print, so to speak…
Well, you will need to see and work the pattern to see the technique I came up with to really cultivate a lace that cannot be deciphered solely upon a simple glance. It was fun trying to figure this out… Almost like a challenge was bestowed upon me, where the prize would be the intrinsic satisfaction of knowing that I figure out how to put in hand and yarn what I envisioned in my mind.
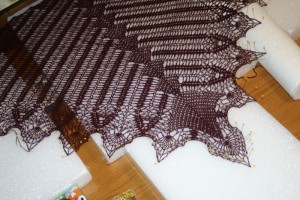
Blocking, take 1. Blocking soon transferred to a blanket on floor. What to do with all the styrofoam?
Designing this shawl in laceweight yarn has opened up a whole new realm for me. I now want to design a whole case of shawls in laceweight! I was hooked at the start.. but for some reason, it felt wrong if I were to design a laceweight shawl before this coming out… I am not sure why, but I did not feel right. So, to satisfy my eagerness to design more shawls, I sketched. So now, I am unleashed!
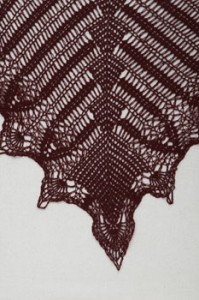
Photo posted with permission from Interweave Press.
I will let you know, this pattern is not for those who are seeking a quick and easy pattern. This pattern will challenge the intermediate (though in a good way), and will give those advanced crafters something different to work. This is a piece of art you are making… This is not your sit in front of the tube and work mindlessly.
This is an heirloom project. Not only will the material be delicate, but it will take a careful and watchful eye. I am always here to help.
When working up this project, think of it not as just that- a project… Think of it as a path to the dragonfly within you, whatever your dragonfly is.
